Sunday, January 22, 2012

My Grandmother's Singer Sewing Machine


It's a new year, and I need to come clean about something.  I have a love-hate relationship with sewing.  You may be asking yourself why on earth did I call my blog paperbakeSEW if my feelings towards sewing are so extreme.  Well, when I'm in the sewing zone and everything is coming together as planned, I really love it.  However, there are times when the sewing machine keeps jamming, straight lines become askew, or time spent unpicking exceeds time spent sewing. At these moments, I feel like scrunching my work up in a ball and throwing it in a corner.  I know I am not alone in this. 

I'll admit, I can be a little impatient, and I do get a little fixated on finishing something at all costs, but sometimes the impatience stems from frustration with not knowing what I'm doing.  You see, I was rather a late-starter.  I didn't do sewing at school and I wasn't raised in a sewing friendly environment.  My Mum was a knitter, and sewing was something she had to do.  I also had an irrational fear of getting my finger pierced by a sewing needle, which I have only overcome in recent years.  You will understand why when I show you the machine I learned to sew on.   And when I say, learned to sew, I mean sewing two bits of scrap fabric together.... possibly twice.

This is my Grandmother's sewing machine:


This is the scary needle, which seemed huge to me as a child: 


My Grandmother bought this machine in 1930 when she got married as she thought that all married women should have a sewing machine.  It was really expensive at the time, and given my grandparents had waited five years to get married because of the Depression and had virtually no money when they finally did, it was a rather extravagant purchase.  It sat unused for most of the time, as my Grandmother preferred to crochet.


My mother was given the machine when she got married.  For most of the time, it also sat unused and, when it did come out to make the occasional school uniform or pair of shorts, it was a big deal.  Mum would "do battle", while I sat on the sidelines watching her work up speed on the treadle and move fabric under the scary needle. The machine would make a hell of a noise when Mum was in top gear, and I think the speed and the noise contributed to my fear of getting my fingers caught.


I only overcame my fear after I did some machine quilting classes.  I went to a craft show where there was a quilt exhibition and thought, I want to learn how to make those.  So, with the help of a very patient teacher and a few deep breaths, I managed to sew two pieces of fabric together... in a straight line...which eventually turned into a sampler quilt.  After that, I had no fear, but I do have a habit of choosing projects above my skill level, and I get stuck (which my Pfaff senses - it's like a photocopier that way) and this leads to frustration and a pile of unfinished projects.

I have always loved my Grandmother's sewing machine as a piece of furniture.  It has so many decorative elements - the wood carving on the drawers and sides, the painted decoration on the machine, the wrought iron, and the engraved metal plates - all of which serve no purpose other than to make the machine a nice piece of furniture.

.


It now takes pride of place in my family room, where I continue the family tradition of non-sewing use.  Instead, it serves as a table for my phone, flowers and various knick knacks.  And when I'm having a frustrating sewing day, I can look at it and take comfort from knowing I come from a line of non-sewers, and that I no longer have an irrational fear of fast-moving sewing needles.

Sunday, December 11, 2011

Christmas Baking - Fruit Mince

I've been flicking through Mrs Beeton's Book of Household Management to see how Christmas baking was done in 1861.   It seems like plum pudding and fruit mince pies containing actual beef were the highlights.  Christmas baking didn't seem like that big a deal, which is a little disappointing as I thought the Victorians would have invented the Christmas baking frenzy, along with all the other Christmas traditions they introduced.

Mrs Beeton's book is a fascinating read.  It was published as a guide for the modern Victorian housewife who had servants to manage and morning calls to receive.  The cookery section made the book famous as the recipes included precise measurements and actual cooking times, one of the very first to do so.  Mrs Beeton introduces the Cookery section with the following:

"As in the Fine Arts, the progress of mankind from barbarism to civilisation is marked by a gradual succession of triumphs over the rude materialities of nature, so in the art of cookery is the progress gradual from the earliest and simplest modes, to those of the most complicated and refined."

I am about to disappoint Mrs Beeton by using a jar of ready-made fruit mince, an act which is neither complicated nor refined, just simply convenient.  If I was in 1861, making fruit mince would have involved removing currants from their stalks, carefully picking over said currants to remove all stones and grit, stoning the raisins, and mincing beef and suet, all at the beginning of December for use in a fortnight's time.  Life is too short, even with the packaged dried fruit available today and the non-involvement of any meat products. There is good quality fruit mince available, and I say embrace the ready-made.  Mrs Beeton seemed like a pragmatic sort of a woman for her era and class, so I am hoping the 2011 version of her would understand the competing priorities of the modern woman and support my decision, however unrefined.

Fruit mince pies - blind bake sweet pastry in mini-muffin tins, add the fruit mince and bake for 5 minutes at 150 degrees celsius.  For a traditional look, decorate with a star and dust with icing sugar.


 For a more contemporary look, top with some pashmak (Persian fairy floss).


Fruit mince shortbread slice - Make a shortbread mixture in a food processor (a traditional recipe works best as you need the structural integrity of rice flour) to which you add two egg yolks.  Press two-thirds of the mixture into a 23x23cm tin and spread over a 410g jar of fruit mince.  Sprinkle the remaining shortbread mixture over the top.  Froth up the egg whites and pour over the top.  Sprinkle with sugar and bake, in the words of Mrs Beeton, in a "brisk" oven (180 degrees celsius) for 20 minutes.


Sunday, December 4, 2011

Christmas Gift Wrapping ideas - Birds

One last gift wrapping hurrah before Christmas, using birds as a theme.  I don't have any Christmas-related bird stories, but I can tell you about Sylvester.  When I was about 5 years old, a baby Senegal dove fell out of its nest and into our backyard.  We rescued it, and I named him Sylvester after Sylvester the Cat from the cartoon Sylvester and Tweetie Pie.  It made perfect sense to me at the time.  We kept Sylvester in a lined box in the laundry and fed him barley and water.  Every day, my Mum would take Sylvester outside for flying lessons, which involved putting him on her arm and waving it up and down.  One day, he flew off, and we never saw him again, much to my devastation.  To this day, my family still refers to Senegal doves as "Sylvesters", to the extent that I had to phone my Dad this morning to ask him "What kind of birds are Sylvesters?".   


I like to use decorations when wrapping gifts, and I found these metallic bird decorations at a craft fair earlier in the year.  For this gift, I've used red tissue paper and hemp twine for a minimalist, slightly Japanese look. 


For this gift bag, I've suspended the bird mid flight using red and white twine.


Another way to feature birds in your gift wrapping is by using decorative ribbon. This ribbon is cotton twill, which always looks good against brown paper.  The ribbon on the bag is glued on using all purpose craft glue.


Red and light blue is such a classic colour combination, and this red and cream ribbon really pops against the glossy blue paper.


Not strictly gift wrapping, but I made these cards using decorative paper to complete the theme.  For this card, I used a Christmas decoration as a template.


The card on the right featured in my 13 November 2011 post on Christmas cards and gift tags.


If your relationship with birds is more Tippi Hedren than Sylvester, you may find using birds as your Christmas wrapping theme quite cathartic.

Sunday, November 27, 2011

Rhubarb and Blood Orange Tartlets

It is traditional in the lead up to Christmas to thrash some rhubarb.  I should explain.  I come from a family who likes a quirky turn of phrase, and our conversations are littered with expressions from books, comic strips, radio shows, plays, TV shows and things my Grandmother used to say in the 1930s.  One of my favourite expressions is "rhubarb thrashing", which comes from the English comic strip "The Perishers".  I've never read it, but my parents were big fans.  Apparently, St Smithian's Day (St Smithian is the patron saint of rain) was celebrated with competitive rhubarb thrashing.  Every time I make something with rhubarb, the inevitable question "Have you been thrashing some rhubarb?"  is asked.

Rhubarb has been in season for several months in Australia, but I don't generally get excited by rhubarb until quite late in the season.  I think it is the deep, red colour of the stalks that make me think of Christmas.  I also like the sweet/sour flavour of rhubarb which cuts through the richness of other Christmas offerings. 

Rhubarb and orange is a classic flavour combination.  For these tartlets, I'm using blood orange juice, as it also has a sweet/sour quality.  I've heightened the orange flavour in this recipe by adding orange blossom water.  However, if orange blossom water makes your head want to explode, substitute with orange rind.


Rhubarb and Blood Orange Tartlets

Pastry

250g plain flour
100g icing sugar, sifted
pinch of salt
100g unsalted butter
2 eggs

Rhubarb filling

6 stalks of rhubarb, chopped into 3cm chunks
80g caster sugar
2 tbsp blood orange juice
A few drops orange blossom water (or 1/2 tbsp blood orange rind)

Meringue

2 egg whites
pinch of salt
75g caster sugar

You will need four mini muffin tins as this recipe makes 40 tarts.

Put the flour, icing sugar and salt into a food processor.  Cut the butter into cubes and soften.  If you have just taken the butter out of the fridge, then put the cubes in the microwave for 12 seconds.  Place the cubes in the food processor and pulse until you get a grainy consistency.  Add the eggs and pulse again until a dough starts to form.  Take the mixture out of the food processor and put it on a floured surface. Bring the dough together gently with your hands to form a disc.  Wrap in cling film and refrigerate for about 2 hours.  This dough is extremely soft so it needs the extra hour in the fridge.

Roll out the dough to about 2mm thickness, and cut out circles using a biscuit cutter.


Put the pastry discs into the mini muffin tins and then put the tins in the freezer for about 15 minutes to firm up.  Meanwhile, pre-heat the oven to 180 degrees celsius.  Take the tins out of the freezer and prepare them for blind baking.  I know that blind baking tartlets of this size is a complete pain, but it is worth the effort. 


Blind bake the pastry for 10 minutes, remove the pastry weights, and then bake for another 10 minutes until the tartlets are golden and biscuity. 

While the tartlets are baking away, you can make the rhubarb mixture.  Put the chopped rhubarb into a frying pan. 


Sprinkle with the caster sugar and then add the juice (and the rind if you are using it).  Cook over a high heat, stirring occasionally, until the liquid has evaporated and you're left with a smooth pulp. 


If there are any remaining woody bits, remove these and put them in a glass bowl with a squeeze of blood orange juice and blast in the microwave for 15-20 seconds.  This breaks the rhubarb down.  Stir into the rest of the pulp, and set aside to cool.  When cool, stir in the orange blossom water.

To make the meringue, put the egg whites into an electric mixer with the salt.  Beat the egg whites on a high speed until stiff, then gradually add the sugar.  Continue beating until thick and glossy and the sugar has dissolved.  You can check this by rubbing a small amount of the meringue between your fingers.  If you feel any grains, then continue beating until completely dissolved.

Put a small amount of the rhubarb mixture into each tartlet.


Pipe over the meringue, and bake the tartlets at 180 degrees celsius until the meringue takes on a golden hue.  Cool, then serve.


I'm not quite sure what rhubarb thrashing involves, but its sounds like it could be good for releasing a bit of stress.  Comfort eating is another way, so knock yourself out with these thrashed tarts.

Sunday, November 20, 2011

Christmas Wrapping Ideas - Matryoshka dolls

In 1978, my family flew to Hong Kong on Christmas Day for a holiday.  As a child,  I remember being very excited at receiving a foam snowman decoration with my in-flight meal, courtesy of Cathay Pacific.  I also remember being pretty excited by the break in family tradition.  Up until this moment, we had been a turkey, roast vegetables and Christmas pudding kind of a family, and it felt like we were doing something really radical.

In Hong Kong, we did all the touristy things, and a few non-touristy as well.  On one of our shopping expeditions, we came across a Russian shop where Dad bought me this Matryoshka nesting doll.


As a consequence, I've always associated Matryoshka dolls with Christmas.  And it seems others do too as lots of different Matryoshka products are now available.  Building on my last two posts, here are some Christmas gift wrapping and gift tag ideas using Matryoshka dolls as the theme.

Matryoshka au natural
 
As you already know, I am a big fan of brown paper and twine, and stamping brown paper with a Matryoshka doll in red ink screams Christmas.  


The gift tag is a luggage tag covered with brown paper, and is stamped with a smaller Matryoshka.  I've tied it all together with some navy blue paper twine.
 

Here I've used brown paper and a teal blue decorative ribbon.  I've made the gift tag by cutting out a Matryoshka doll from some recycled gift wrap.


Red and blue is always a bright combination for Christmas.  Here I've used gift wrap, which is made from recycled paper, in two ways.  The cylindrical gift has been topped and tailed with some blue grosgrain ribbon.


Matryoshka cute

Pink, green and white is always a really popular colour theme for Christmas.


This Matryoshka themed Christmas paper looks good when paired with some green ric-rak as the accent colour. 


A Matryoshka embroidered ribbon works well against glossy, white paper.


For the gift on the left, I've used pink sheer curtain fabric to wrap the present and create a thick bow.  For the gift tag, I've cut out one of the Matryoshkas from the wrapping paper and stuck it to a white luggage tag.

Matryoshka luxe

This is handmade paper from India (which I happened to buy in Seattle), and the colours and design give it a real luxe quality.  I've paired it with with some olive green grosgrain ribbon and black ric-rak for two different looks.


For this luxe look, I've stamped and embossed some black tissue paper using gold embossing powder.  I've finished the look with a sheer gold ribbon, thick black glossy 'twine' and a gold wooden heart.


Matryoshkas are iconic and, so it seems, multi-purpose.  Here they are enjoying some well deserved down-time.


Sunday, November 13, 2011

Christmas cards and gift tags

The Christmas Carol gods must have been reading my blog last week, as this week I heard Christmas carols nearly everywhere I went.  Chestnuts were roasting on an open fire, with Jack Frost apparently nipping at my nose, which was rather incongruous given it was 25 degrees celsius outside.  Fortunately, the Christmas carols did not have their usual effect on me so the panic did not start to rise, although I did go a bit crazy buying wrapping paper and ribbon so I am probably on the river denial.

This week's post is all about ideas and tips for Christmas cards and gift tags. Making your own Christmas cards and tags doesn't have to add to your already heightened stress levels.   As you should know by now, I like a less is more approach, and using and re-purposing what I already have. You can knock these cards off in a few hours and even less time if you have small people in your life to help production-line style.  My cat Piaf doesn't have the necessary motor skills so I was on my own with these.


1.  Make sure you have all the supplies you need - There is nothing worse than running out of something when you're in the middle of being creative.  It really kills the mood.  As a minimum, you will need blank cards, a selection of Christmas-themed scrapbooking paper, scissors, a box cutter, double-sided tape, a cutting mat and some ribbon or twine.

2.  Have a cup of tea - Before you start, have a cup of tea as once you get into the card making zone, you'll be there for a while.  I also recommend having some chocolate close by for when your energy levels start to flag. It will happen, so be prepared.

3.  Use Christmas decorations as templates for decorating cards - Flat Christmas decorations are ideal templates for cutting out shapes to stick onto white cards for a simple, minimalist look.  I like to use retro-style Christmas paper as I think the designs and colours add to the simplicity of the overall look.  Minimalist cards also stand out on a shelf of traditional Christmas cards. 

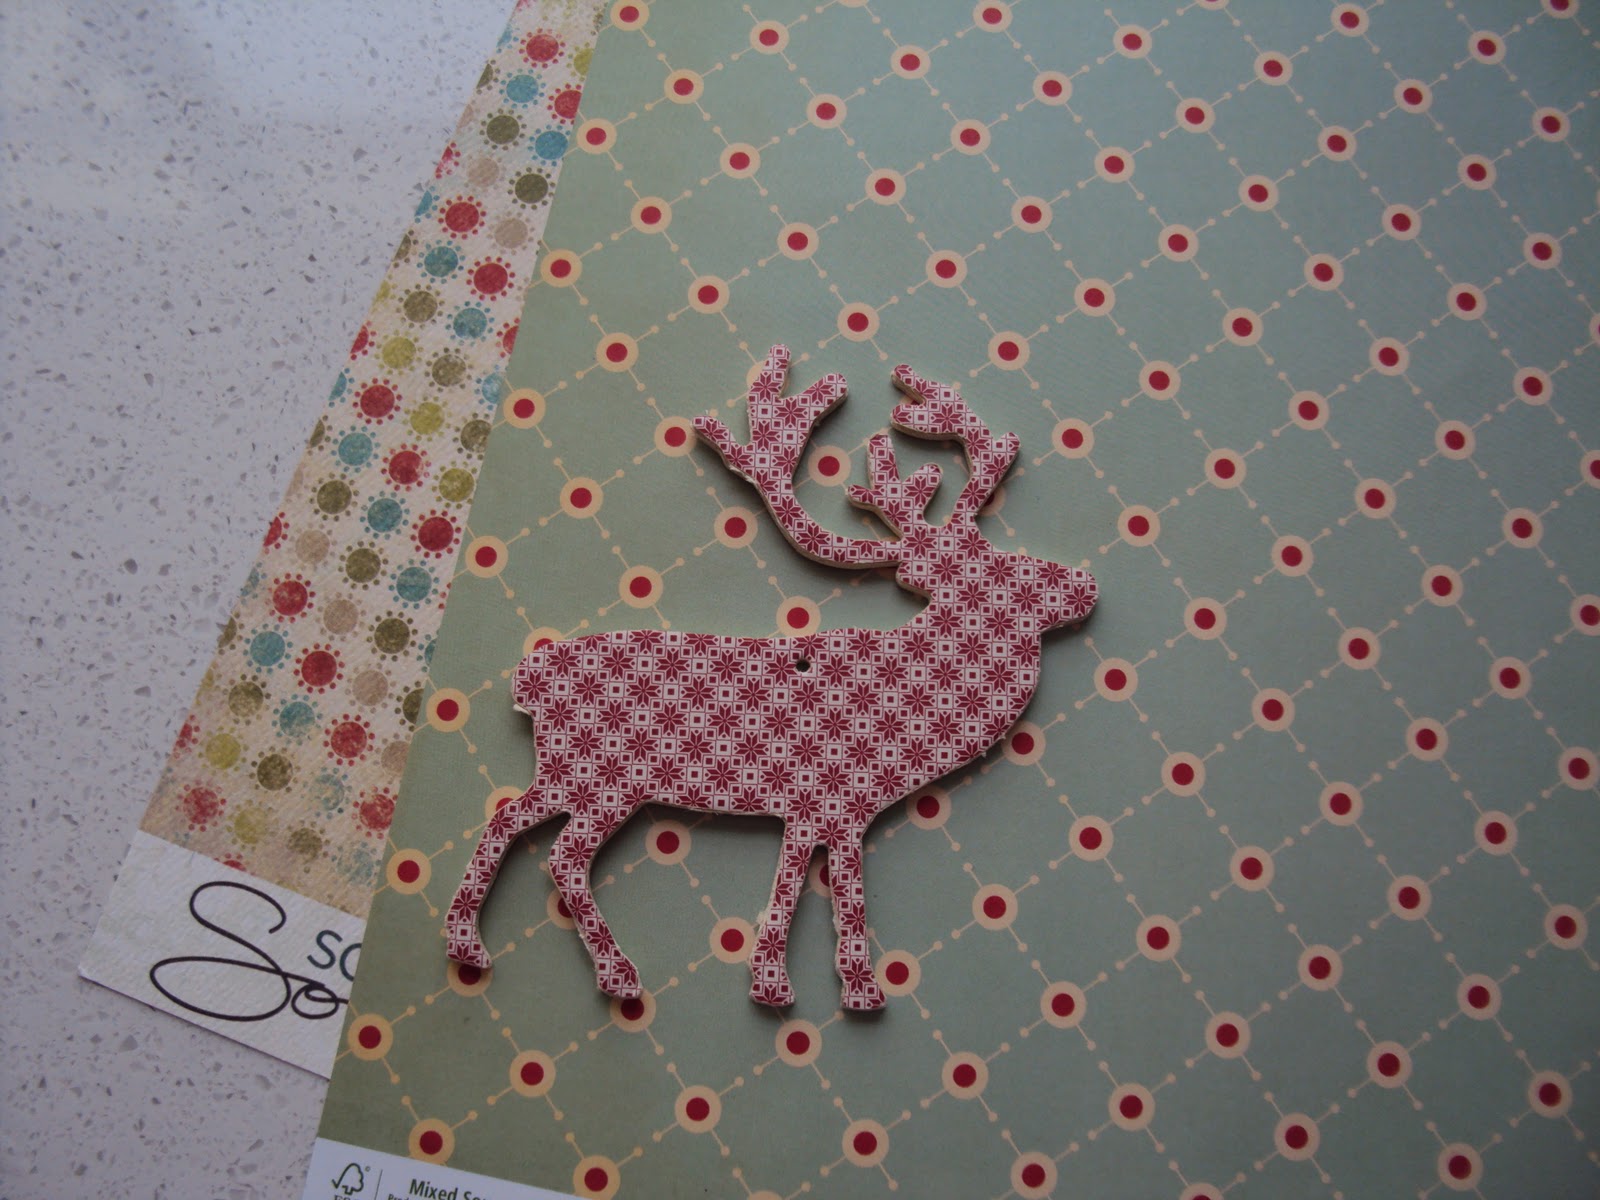
Here I've used the Ikea reindeer decoration, which featured in last week's post, as the template. 


Just trace around it, then use a box cutter to cut it out.


Stick the reindeer on the card using double-sided tape, et voila. 


4.  Use Christmas decorations as templates for gift tags - Christmas decorations are just so versatile.  Again, just trace and cut. 


5.  Use Christmas decorations as gift tags - Just stick an adhesive label to the back of a flat decoration and you have an instant gift tag.


6.  Trace shapes from old Christmas cards to make templates - I always keep the cards people give me.  Here is a bird I traced from an old Christmas card, and then used it to make templates of the three main parts - body, wings and tail. 


I used contrasting papers to highlight each part.


7.  Discover triangles - Christmas-themed paper + triangle = Christmas tree. 


8.  Use luggage tags to make gift tags - Cover a luggage tag with Christmas paper and you have an instant gift tag.  Add a bit of interest with some ribbon, twine or flutter wool.


9.  Use paper punches to create shapes - I've had this Christmas tree punch for years.  Here I've used it to create a Christmas tree shape.


There are lots of different ways to create simple and stylish Christmas cards that don't take ages to make or require expensive materials.  People appreciate a homemade card, and I'd encourage you to give it a go.


Sunday, November 6, 2011

Christmas Gift Wrapping - General tips

I have been meaning to mention the C-word for the past couple of weeks.  Christmas.  Is coming.  Soon.  Fruit mince pies and panettone, Christmas decorations and cards have started to appear in the shops.  Fortunately, Christmas carols haven't so it is still possible to shop in peace and quiet until the madness starts for another year.  Don't get me wrong, I like Christmas carols.  In fact, on Christmas Day, I like to add a bit of festive atmosphere by playing the Frank Sinatra Christmas album, much to the horror of my family.  Frank does a good carol, but I'm not ready for them just yet. 

I do love Christmas as, if you are a crafty/baking person, it is your time to shine.  People love homemade gifts, beautifully wrapped presents and the once a year baked goodies, like shortbread and fruit cake.   Over the next few weeks, I will be posting some ideas on Christmas gift wrapping, card making and baking.  This is very organised for me as I don't start thinking about Christmas until a couple of weeks beforehand, and usually in a panic-stricken state.  I know I am not alone as each year I see people like me walking around shopping centres at an unnaturally fast pace with fierce looks of determination.  I like to add to this stress by baking until all hours of the night.  The nights in Australia are pretty warm by this time, which adds to the pressure cooker atmosphere.  Whether you're a last minute person or an organised months in advance person, I'm hoping these posts will give you some tips and ideas for making your handmade Christmases a bit easier. 

I thought I would start with some general tips on Christmas gift wrapping:

1.  Choose a theme - A theme establishes the framework from which everything else, including cards and decorations, will flow.  A theme makes shopping so much easier as it allows you to remain focussed and not be distracted by shiny non-theme related objects.  Presents wrapped in a coordinated theme also look good under the Christmas tree. Some themes to think about include red and white, contemporary, minimalist, Scandinavian, and Arctic winter.  Here is an example of a minimalist theme I used a few years ago.  Its a simple sprig of decoration on a white, glossy background.


2.  Use Christmas decorations to accessorise your gifts - I like to use Christmas decorations to add colour, contrast and texture.  The post-Christmas sales are good for picking up decorations at half-price which can be re-purposed the following year.  I used reindeer decorations from Ikea last year for a contemporary Scandinavian look.


3.  Use plastic wrap to glam up plain paper - If you like to wrap your presents in plain paper, one way to add a touch of elegance is to wrap the present again in thick plastic wrap, and finish it with a fabric ribbon.


4.  Use fabric ribbons to add interest - Whether you prefer plain or patterned gift wrap, an interesting ribbon can really take your gift wrapping to the next level.  Here I've used ric-rac which, together with a wooden decoration, adds contrast and texture.


5.  Use paper bags, boxes and fabric to wrap odd shaped presents- Gift wrapping should not have to involve the laws of physics.  If you need to wrap an odd shaped present, put it in a gift bag.  You can spruce up plain paper bags by using decorations, quirky ribbons, and stamps.  Fabric is also very forgiving and is particularly good for wrapping round and oval shaped presents.  Boxes, especially noodle boxes, are good for wrapping baked treats.


6.  Iron your wrapping paper - If you're using folded paper rather than paper from a roll, iron it first to remove the crease marks.  Use a low setting and a light touch.  It is worth the effort.

7.  Keep craft glue handy - Sticky tape does not stick to all paper and sometimes glue is required.  I use an all purpose craft glue.

8.  Under no circumstances use Christmas themed sticky tape - Enough said.