Sunday, October 30, 2011

Lemon, and Passionfruit Curd

I was in Melbourne during the week, and came across the most amazing display of cakes in the window of the Hopetoun Tea Rooms in the Block Arcade.  Needless to say, I want to live in these tearooms.


The cake that caught my eye was the passionfruit tart.  Passionfruit is one of my favourite flavours, and passionfruit curd eaten straight from the jar is one of life's great joys.  I didn't manage to try a slice of the passionfruit tart as there was a queue to get in and I was on a lunchtime mission to David Jones.  However, it got me thinking about the versatility of curd. 

Apart from being the main feature of a tart, curd can be used as a base for fruit to sit in, spread between the layers of a plain cake for flavour, drizzled over the top of a pavlova, included as a layer in a crumble or a trifle, poured over icecream, and even spread on a piece of toast.  The beauty of curd is that it can add a citrus zing to an otherwise pedestrian experience.

Good curd is hard to find in Australia.  You often see recipes from overseas that require a jar of good quality curd.  However, most people here make their own.  As summer approaches, a jar of curd in the fridge is very handy thing.  Here are my recipes for passionfruit curd, and lemon curd.  Both curds keep in the fridge for about 3 weeks.


Passionfruit curd

2 eggs
170g can of passionfruit pulp in syrup
150g caster sugar
85g unsalted butter, softened

Put the eggs, passionfruit pulp, sugar and butter into a heatproof bowl over simmering water. Stir continuously over a gentle heat until the mixture thickens (about 10 minutes).  The mixture will continue to thicken as it cools.  When cool, pour into sterilised jars and refrigerate.

Passionfruit curd used as a dipping sauce for madeleines.
The key to a good lemon curd is strain, strain and strain again as there is nothing worse than getting a bit of lemon zest or clump of egg white between your teeth.


Lemon curd

3 eggs
2 large lemons
85g unsalted butter, softened
225g caster sugar

Zest and juice the lemons.  Put the eggs, butter, sugar, zest and strained lemon juice into a heatproof bowl over simmering water.  Stir continuously over a gentle heat until thick (about 10 minutes).  Strain the mixture into sterilised jars and then refrigerate. 

Lemon curd in sweet pastry tarts, topped with blueberries.


Sunday, October 9, 2011

Gift wrapping with doilies

I knew this would have to come out sooner or later.  I like doilies. There, I've said it.  Here are some I have collected from Op shops over the years:


Doilies have been around for a long time, and apparently date back to the 11th century.  They reached their zenith in the 19th century and no Victorian drawing room was complete without a collection of dust- gathering doilies.  However, let's face it, doilies are no longer a popular decorating choice, except with some nannas. 

I like doilies because of their link the past, in particular, the role that needlework played in the creative lives of women.  It took a certain kind of woman who, after spending hours putting clothes through a mangle, wanted to sit down and crochet intricate patterns with cotton thread in failing light.  Sure, some of those women didn't have to work and, in between husband-hunting activities, could focus entirely on sewing a fine seam.  However, I like that, for a period in history, needlework was a skill that many women from all walks of life shared. 

All of the doilies I have collected have been made by machines.  But this does not detract from their beautiful patterns and textures. 


It also means that I don't feel guilty when I re-purpose them for gift-wrapping and card making activities. 

Using craft glue that is suitable for fabric, you can stick doilies onto just about anything.  Here are some ideas for bags and boxes:


For these cards, I cut out flowers from a table runner and glued them on:


You can even use a doilie to give a old t-shirt some interest:


Next time you are in an Op shop, I'd encourage you to go down to that dusty corner and find the old shoebox with the neglected doilies and hankies. After a soak and a wash, they can be given a new lease of life.


Sunday, October 2, 2011

Lamingtons

Something happens to me at this time of the year, apart from hayfever, that is.  I experience feelings of Aussie-ness.   It happens when I hear the national anthem sung at the AFL Grand Final.  There's something about the national anthem at a big sporting event that makes me go a bit Aussie. And by Aussie, I don't mean I get a sudden urge to eat a meat pie, shout 'oi oi oi' from the rooftops, and think about changing my name to Kylie.  It is a feeling of being involved in a shared national experience and, in the case of AFL, watching a uniquely Australian game.  As the AFL Grand Final was yesterday, there is only one thing I can bake today - lamingtons! 


Lamingtons are one of the few "Australian" cakes, apparently originating from Queensland.  They are squares of sponge cake covered in chocolate and coconut.  Interestingly, lamingtons are one of the few cakes my mother never made.  We only ate them once a year when my primary school had its annual lamington drive. The school hall became a hive of activity for an entire day.  Huge slabs of sponges would be brought in from a commercial bakery, and a production line of volunteer Mums would cut, ice, roll and pack. Finished  batches would be ferried in washing baskets to classrooms for orders to be handed out.  It was a big day. Another big day is 21 July, which apparently is national Lamington Day.  Who knew?


Making lamingtons is a two day process as you need to make the sponge a day in advance.  This is important as the sponge needs a day to dry out, otherwise it is too soft to dip in the chocolate.  Bits drop off, believe me.

Lamington Recipe

250g unsalted butter, softened
330g caster sugar
4 eggs
1 tsp vanilla extract
370g plain flour
5 tsp baking powder
1/2 cup milk
250g dessicated coconut

For the icing:

500g icing sugar
50g cocoa powder
40g unsalted butter, softened
1 1/2 tsp vanilla extract
150-250ml boiling water

Preheat the oven to 190 degrees celcius.  Grease a square tin and line the base with baking paper.  I use a 24cm by 24cm tin.

Beat the butter until light and creamy, then add the caster sugar in batches.  Beat thoroughly after each addition to ensure that the sugar dissolves.  Add the eggs one at a time and mix well.  Add the vanilla extract and mix until combined.  Sift the flour and the baking power, and add to the bowl, mixing until just combined.  Add the milk, and mix until smooth. Pour the mixture into the prepared tin, and spread evenly.  Bake for 40-45 minutes, or until a skewer comes out clean.  Like all sponges, rest the cake in the tin for about 10 minutes and then turn out onto a wire rack to cool.  When cool, wrap in cling film.

On the following day, cut the sponge into evenly sized squares.  As it is rare for a cake to come out of the oven with a completely even top, none of the squares will be perfect.


Make the icing by sifting the flour and cocoa into a large bowl.  Add the butter, vanilla essence and 150ml of the water.  Mix until smooth.  You may need to add a bit more water to get the right consistency, which needs to be somewhere between pouring cream and thickened cream.  If the icing is too thick, it won't drip off easily and lumps of the icing will slide off when you roll the squares in the coconut.  You will need to keep adding a little boiling water to the icing throughout the process to maintain the right consistency.

Set up a little production line with the squares, chocolate icing and coconut.  Using a skewer or fork, dip a sponge square into the icing, allowing any excess to drip off.


Then cover with coconut.


Place the squares on a wire rack to dry, which usually takes about 2 hours.


I use dessicated coconut but for a more shagadelic look, use shredded coconut.


There are several ways to serve lamingtons.  As is, or filled with whipped cream and/or strawberry jam.  Classic Australian.

Sunday, September 18, 2011

Gooey Chocolate Brownies

My cat Piaf likes fillet steak.  It is entirely my fault this situation has arisen.


It happened after I gave her a few trimmings of some fillet steak I was preparing.  Now every time I give her minced beef, she looks up at me with a "what the hell is this?" expression on her face, and no longer eats it with the same gusto she used to.  It is the same with chocolate.  Once you've had the good stuff, it's really hard to go back to milk chocolate. 

When cooking with chocolate, it is important to use a good quality dark chocolate.  And by that, I mean chocolate which has a high percentage of cocoa (cocoa butter and cocoa solids).  There is a lot of choice available now, and my supermarket sells chocolate with percentages up to 85 percent.  The percentage you choose to bake with depends on whether you want a bittersweet, semi-sweet or really sweet result.  Chocolate with a high percentage of cocoa is like a blank canvas.  It has less sugar so provides a rich, deep chocolate flavour, and allows you to play around with the amount of sugar required. Chocolate with a lower percentage has more additives like sugar, vanilla and lecithin (an emulsifier), so you are already dealing with a sweet ingredient, and may need to alter the sugar quantities in the recipe to get the balance right.  Basically, if you want a really sweet result, use dark chocolate with a lower cocoa content.

One chocolate recipe that needs a lot of sweetness is the good, old fashioned brownie. If you like a brownie with a high goo factor, this recipe is for you.  It uses dark chocolate with 50% cocoa, to which a lot of brown sugar is added.   The end result is rich, sweet, fudgy brownie, which I can highly recommend.


Gooey Chocolate Brownies

150g unsalted butter, chopped
440g dark chocolate, with 50% cocoa
1 1/2 cups light brown sugar
3 eggs
1 tsp vanilla extract
3/4 cup plain flour
1/2 cup sour cream
3/4 cup walnuts

Preheat the oven to 180 degrees celcius.  Grease and line a brownie tin.  I always use a 24 x 24 cm deep square tin. 

Chop 300g of the chocolate roughly, put in a bowl and melt over a saucepan of gently simmering water.  Add the butter and take the saucepan off the heat.  Stir the butter with the chocolate until smooth. 


Chop the remaining chocolate into small pieces. 


Add the brown sugar, eggs, vanilla extract, flour, and, sour cream to the melted chocolate and stir until smooth.  Add the chocolate pieces and the walnuts and stir until evenly distributed. 

Pour the mixture into the tin, and spread evenly.


Bake for 40 minutes initally, cover with foil and then bake for another 20 minutes.  Leave to cool in the pan.  Turn out and cut into evenly sized portions.


Sunday, September 11, 2011

Custard Tart

My Mum was a big believer in the after-school snack.  When my brother and I got home from school, there was always something tasty waiting for us, either homemade or otherwise.  The otherwise usually came from the deli at the end of our street, which stocked iced buns, custard tarts, vanilla slices and 'dutch' cakes (spiced ginger cake on a pastry base decorated with pink icing).  I think my Mum was one of their best customers.

Even though I consumed quite a lot of custard tarts as a child, I have never had one as an adult.  I've certainly had versions of the custard tart, such as lemon and lime brulee tart, but its been decades since I've tasted a pure, unadulterated baked custard tart with nutmeg sprinkled on top.  I'm about to right that wrong. 

As I don't have a tried and true recipe, I did some research and discovered there are several different approaches to making a custard tart.  Some recipes use cream, others use milk, and some use half cream and half milk, and sometimes the milk/cream is heated beforehand.  The quantity of sugar varies, as do cooking times and oven temperatures. What to do, what to do?  I decided to use a sweet pastry recipe I know well for the tart base, and was inspired by a number of other recipes for the filling. 


Custard Tart

Sweet Pastry

100g caster sugar
200g unsalted butter
300g plain flour
1 egg

Filling

3 eggs
600ml whipping cream
2 tbsp caster sugar
1 tsp vanilla essence
nutmeg for sprinkling

To make the pastry, ensure the butter and egg are at room temperature before you start.  Cream the butter and sugar until light and fluffy. 

Add the egg, and mix until well combined.  Add the flour and mix gently until just combined.  Tip the dough onto a floured surface and bring the mixture together gently until smooth.  It is important not to overwork the dough at any stage during the process otherwise it will lose its delicacy. 


Pat the dough into a disc shape (so that it is easier to roll out afterwards), wrap in cling film and refrigerate until firm.  I like to make my dough the night before so it is very well chilled before use. 


Roll out the dough on a floured surface and then press it into a deep pie tin.  I used a 24cm fluted tin, which was probably a bit too big as there ended up being too much of a gap between the custard filling and the top of the tart.  However, if there is too much 'edge', this can be trimmed off before serving.


Refrigerate the tart shell until firm.  There will be some dough leftover.  Keep this, as you can use it to plug any cracks in the pastry shell after it comes out of the oven.

Meanwhile, pre-heat the oven to 200 degrees celcius.  Blind-bake the pastry for 10 minutes.  Remove the pastry weights and bake for another 10 minutes until the pastry is golden. 


Reduce the oven temperature to 170 degrees celcius.

In a bowl, whisk the eggs, sugar and vanilla essence until combined and without making too much froth otherwise this will create lots of bubbles on the surface of the custard.  Pour in the heated cream and whisk gently. Strain the liquid to ensure there are no eggy bits and pour into the tart shell.  Bake in the oven for 15 minutes, then remove it and sprinkle the surface evenly with nutmeg. 


Put the tart back in the oven and bake for another 15 minutes.  As you can see I am using a pastry edge protector so the edges don't get too brown during the cooking process.

The centre of the tart will be wobbly when you take it out of the oven but, don't panic, as it will set as it cools.  Leave to cool at room temperature for about an hour and then refrigerate until ready to serve. 

Serve with berries or stewed rhubarb.

Sunday, September 4, 2011

Father's Day gift wrapping

Another family celebration, another pavlova.  The men in my family have a sweet tooth, and any 'male' related celebration involves a pavlova (see 14 August 2011 post for the recipe).  Today is Father's Day in Australia.  My Dad, who is against any sort of commercialised celebration, wasn't keen on marking the day.  I said to him, "Father's Day isn't all about you", and mentioned the possibility of pavlova.  That sealed the deal.   Notwithstanding my Dad's anti-Father's day stance, I bought him a present, "Wall and Piece" by Banksy. 

Wrapping presents for men is challenging at the best of times, and even more challenging when you are trying to make the gift look low key and non-commercial.  It is particularly difficult for me, as I do love a flourish, and have to fight all of my natural instincts.  Initially I thought of using brown paper decorated with a Banksy-esque stencil and a comment on the state of the nation, but then I remembered that I don't know how to draw.  Instead I decided to go au natural with brown paper, woven millinery straw (sinamay) and hemp string.  As the overall colour palate is so similar, nothing stands out and screams commercialism.


After wrapping the book in brown paper, I cut a piece of woven straw to go around the middle and stuck it to the back. 


I then taped one end of the hemp string to the back of the present and wound it around the middle five times, taping the end.  Simple.


But I couldn't resist one little subtle flourish.  A small wooden heart stuck in the middle. Dad can't possibly argue with that.


Sunday, August 28, 2011

Gift wrapping with flowers

When I am out shopping, I always have an eye out for things I could potentially use to decorate a gift.  I like to rummage around on sale tables looking for charms, ribbons and decorations and give them a second life.  The post Christmas and Easter sales are always good and I often pick up decorations that are not too Christmassy or Eastery that can be used throughout the year.  Craft shows are also good for little bits and pieces like charms that can be strung on a ribbon and tied around a gift, and paper decorations that can be stuck onto cards or wrapping paper.  As I go shopping more often than I go to gift-giving occasions, I have quite a collection.  Here is just a quick peek at the tip of the iceberg:


Gift wrapping is like any other creative process.  I like to think about the present, the person I'm giving it to, the colours the person likes, whether these colours are appropriate for the gift and the occasion, the balance of decoration relative to the size of the present, differences in texture and, importantly, the kind of mood I'm in.  I tend to use plain wrapping paper, usually glossy white or brown, rather than patterned paper, as it allows greater freedom when choosing the decorative elements.  I usually try out several combinations of ribbons and decoration before deciding on the final one.  Sometimes things comes together quickly, and sometimes they don't, and you just have to go with the flow.  When nothing is coming together, I go to Plan B, which involves a box or a bag with lots of cellophane or tissue paper.

This morning I wrapped a book on flower arranging for a friend's birthday.


As my friend likes pastel colours and the book includes lots of pictures of pastel-coloured arrangements,  I decided to wrap the present in soft colours.  And because the book is about flowers, there needed to be a flower somewhere.  Fortunately, I had a millinery flower in my collection I had bought at a post-Melbourne Cup sale at Spotlight a couple of years ago.

I started by inserting a glue-dipped stem into the base of the flower. 


I then covered the base of the flower with floral tape.


I wrapped the book in thick white glossy wrapping paper, and covered it again with a soft green, crepe-like paper.


I then wrapped the present with silver ribbon, by fixing one end to the underside and winding the ribbon around the present Egyptian mummy-style.


I then inserted the flower underneath the ribbon, et voila!


This is so easy to do with any kind of flower, and takes no time at all if you have the right gear to hand.  I think the result is simple and elegant. 

Sunday, August 14, 2011

Fail-safe Pavlova Recipe

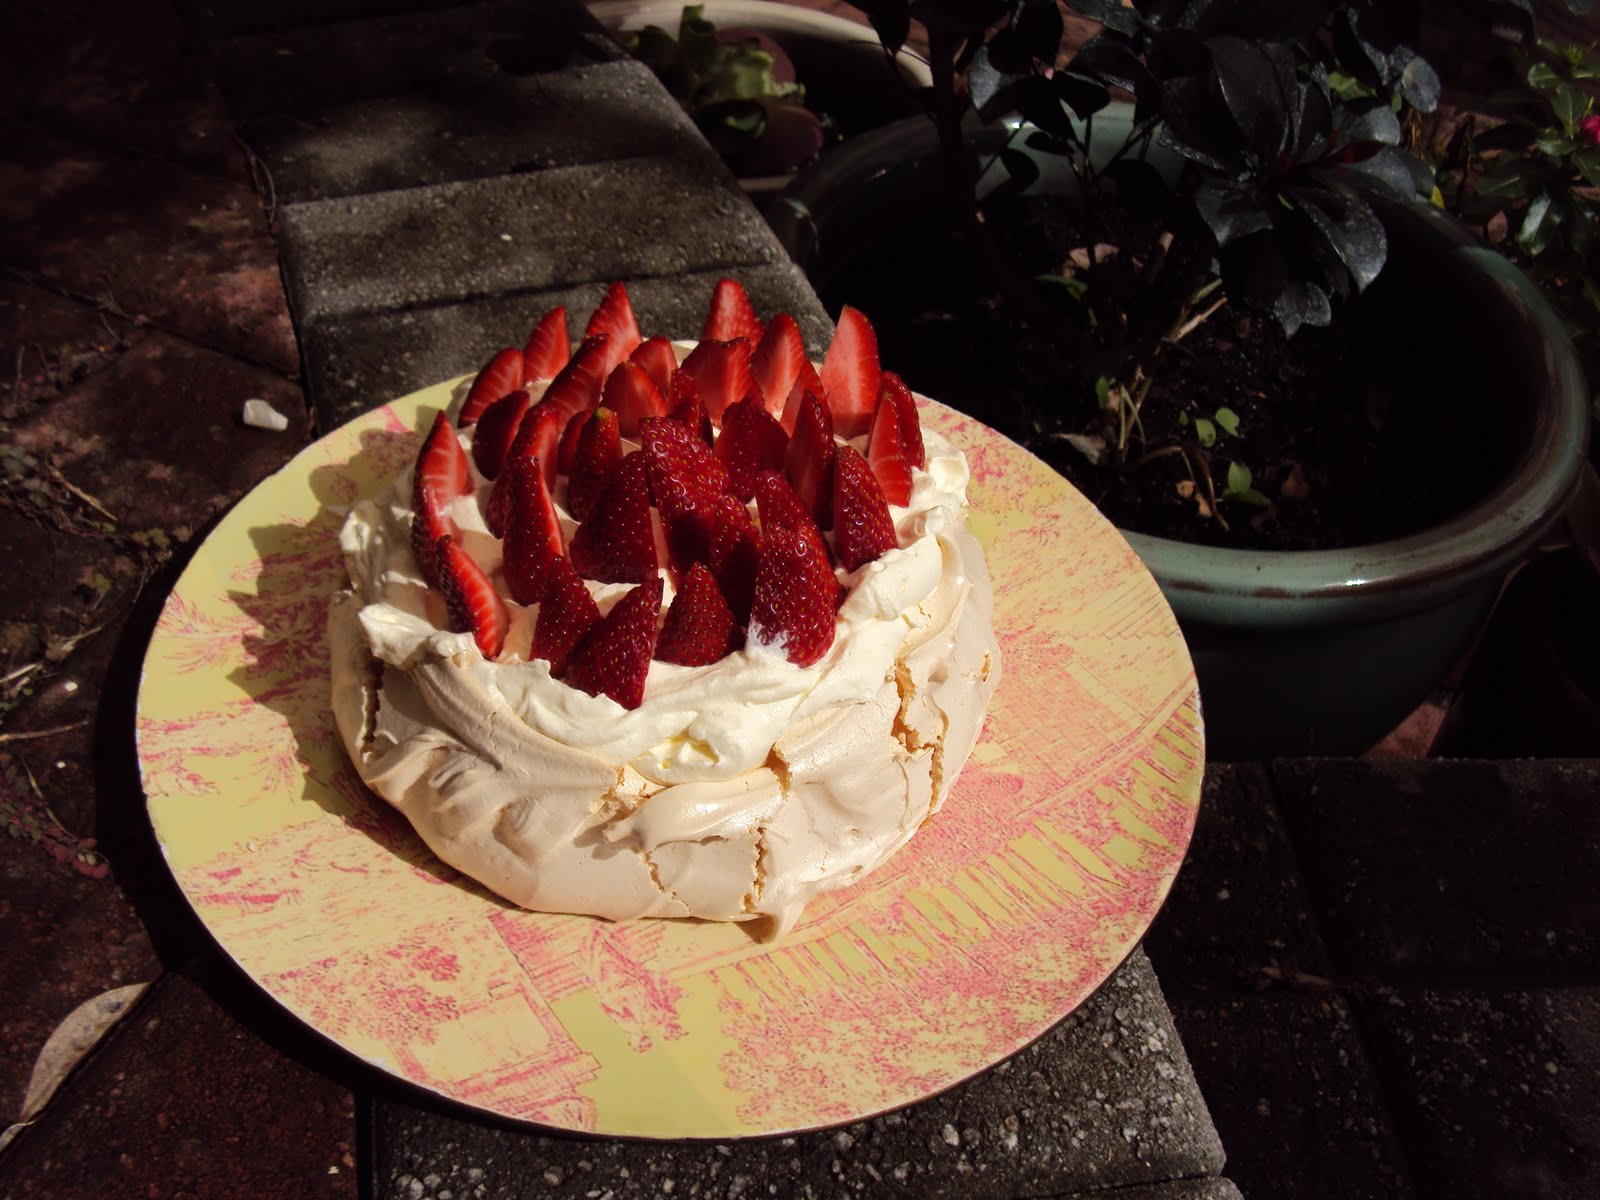
Strawberries have started to appear in the shops, which means only one thing in Australia - its Pavlova season!


Pavlova is essentially a giant meringue, with a crusty outside and a marshmallowy inside, and is always decorated with whipped cream and fruit.  Strawberries are a very popular choice, but a tropical topping with kiwi fruit, mango or peaches, and passionfruit is also very popular.  I'm a straight down the line strawberry girl for the everyday pavlova, but on a special occasion, like Christmas, I augment with blueberries and raspberries and drizzle with passionfruit curd.


The origin of the pavlova has been the subject of considerable debate between Australians and New Zealanders, with each claiming the original recipe.  I'm not going to get into that here, except to say that it is a very popular dessert in both countries.  Everyone does agree that the dessert was named after the Russian ballerina, Anna Pavlova.  I used to have a Russian Blue cat called Pavlova, but that is a whole other story. 

Pavlova is quick and easy to make, and especially satisfies the sweet tooth in any family.  You can also make the recipe gluten-free by using a gluten-free cornflour. 

Here is my fail-safe pavlova recipe.

Pavlova

4 egg whites
a pinch of salt
225g caster sugar
1 tsp cornflour
1 tsp vanilla essence
1 tsp white wine vinegar
600ml thickened cream
fruit to decorate

Preheat the oven to 140 degrees celsius.

Line a baking sheet with baking paper.  Whisk the egg whites with a pinch of salt until stiff, then gradually add the sugar one dessertspoon at a time until thick and glossy.  To test if all the sugar has been dissolved, dab an index finger in the mixture and rub against your thumb.  If you can still feel grains of sugar, you need to keep whisking. 


Add the cornflour, vanilla essence and white wine vinegar into the mixture and mix until dissolved.  By the way, I have tried using vanilla extract, but the meringue ends up looking a little too brown.  What you are trying to achieve is a glossy, snowy finish. 
Spoon the mixture onto the lined baking tray and then shape into a circle, smoothing the sides as you go.


I prefer to create a high meringue, as it looks nicer when you cut the pavlova into slices, but this means there is less room to decorate the top.  If you like a lot of fruit, then create a flatter disc. 


Bake the meringue in the oven for about an hour.  Let the meringue cool on the tray.  The middle will crack and sink a little bit, but don't be alarmed as you can fill this up with cream.


When cool, carefully peel off the baking paper and place on a large serving plate.  Decorate with an enormous amount of whipped cream, and your fruit of choice.  Keep in the fridge until ready to serve.